Launched the fiberglass rocket again. This time it didn't go so
well, just after burnout the nose cone separated from the rocket and
pulled the parachute out of the payload bay. When the parachute opened
the shock cord broke and the rocket was doomed to crash.
I can't exactly tell why the nose cone separated, probably the collar was to small and the fit just wasn't tight enough.
The payload section was completely destroyed and will need to be rebuild. The pressure vessel seems OK, but a hydrostatic pressure test will have to show if that's true.
I've made a start with the rebuild of the deployment system. I need to roll another fiberglass tube for the payload bay, maybe I will just roll a 1 meter length tube and use the leftover as a extension of the pressure vessel, that would add another 70 CM and approximately 1.5 liters to the rocket.
Again it's been way too long since I posted something here... Time to update!
I'm still struggling with splicing bottles, every time I give it another try the splice looks good but when I pressure test them they fail at < 100 psi. The problem seems to be that the bottles just aren't strong enough and they delaminate. Is PL Premium really the only glue that works? Hope I can get my hands on a tube of PL Premium some time to test this...
So I switched to another project, I first wanted to try to build a rocket with a FTC pressure vessel but unfortunately FTC is not a common product here in the netherlands, there are some online stores that sell FTC but they charge 25 euro shipping costs! That's way to more than I'm willing to spend on a few pieces of FTC.
Inspired by Aircommand Rockets I decided to give fiberglass a try. I just wanted to make a thin walled fiberglass pressure vessel since I'm not (yet) aiming on high pressure rockets.
The method I used is described on the Australian Rocketry Forum ,the same topic Aircommand Rockets refers to in their Shadow build log but this is a less complicated method which I thought would work for my project.
In this topic rocket_troy says:
these days I much prefer a more foolproof, cleaner and simpler method
that always results in a very effortless slip-off removal. This simply
involves laying 1 or 2 coats of newspaper around the mandrel and coating
that with packing tape - ensuring the entire area to be coated or laid
up over is totally sealed with the tape.
So I gave it a try.
Fiberglass tube curing
Cured and mandrell removed
Pressure testing
Now that was easy!
Rolling the tube was pretty straight forward, first a layer of newspapers was wrapped around a PVC tube, than the newspaper was covered with packaging tape. Slowly wrapped fiberglass cloth around it and at the same time added epoxy. I waited 48 hours when before I removed the tube from the mandrel and it just slipped off.
Then I glued the end caps in and it was pressure tested to 150 psi.
And one thing leads to another.
Fiberglass pressure vessel 5,2cm dia 100cm long
End cap
First flight (and last flight to date)
I tried to launch this rocket with drop away boosters but due to a leaking o-ring (and spares left at home) this flight was cancelled.
Fiberglass water rocket with drop away boosters
I hope I can find the time to give it another try soon...
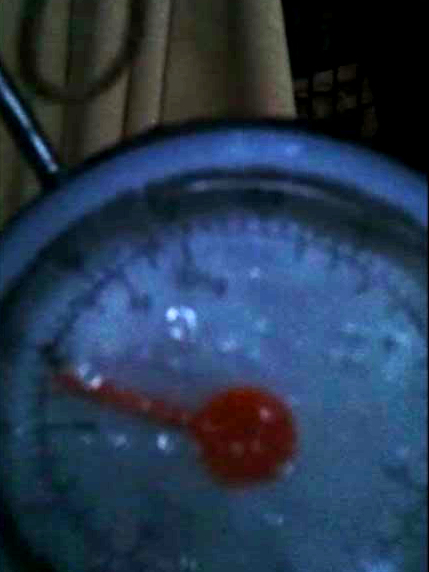
The fact that I didn't know how much force it would take to get the tube of the bottle, was constantly on my mind so I did some more testing today. I took the luggage scale again and made a pulley system so I could easily pull with more force. The scale went 1,5 times around (which would be around 50kg force on the tube) when the rope broke again. I really wanted to know what it would take to get it of, so it was time for some brute force.
This is just the last part of the video, there where more than 10 hits preceded. Finally the tube is off but was it the glue that gave up?
a layer of pet has been pulled off
No, probably not, looking at the bottle it looks like a layer of pet has been pulled off.
Difficult to see in the picture but there's a very thin (shiny) layer of pet still stuck on the glue.
So I still don't know how much force in kg it would take, but I know for sure that this glue bonds very well to pet, in fact it's stronger than pet. I'm definitely going to use this glue to make the drop away boosters...
It's been a while since my last post but I'm back in water rocketry again.
I'm planning to build some drop away boosters for the last rocket I made. I want to build the boosters out of spliced pairs so I needed to find a strong glue that will stick to pet. There's a glue called PL Premium that's often used for splicing but unfortunately it's not available here in Holland. I've looked in several stores for other PU glues (PL Premium is also a PU glue) with the same specifications as PL Premium but didn't find a match. So I just bought a glue named "Tangit M400" a PU glue that looked promising to me. I made a asymmetric splice out of 2 coke bottles and the next day I did a hydro pressure test, unexpectedly it held up to 100 psi and there was no sign of any leaks, I could not test at higher pressures because I'm still stuck with the old bicycle pump, I'll probably get a new one soon so I can do a real burst test on the splice.
The test splice, next time I'll use a little less glue.
For the drop away booster system there need to be tubes at the sustainer and pins at the boosters. I tested 3 glues to attach tubes to a pet bottle; Tangit M400, Pattex PL600 and Pattex Power Fix. The PL600 is also a PU glue and the Power Fix is a polymer based glue.
The 3 tubes glued to a bottle. from left to right: Tangit M400, Pattex PL600 and Pattex Power Fix.
The wires you see in the picture were used to attach a luggage scale with a bucket underneath, when testing the bucket was slowly filled with water to increase the force on the tubes.
thetest setup. not prettybut it works.
At first i tested the Power Fix glue, it held up to ~6 kg.
The PL600 gave up at ~7 kg.
With the Tangit M400 I filled the whole bucket with water and it was still holding, I pulled the bucket down until the scale was at 14 kg but still no sign of the tube coming loose, I removed the bucket and and hung a loop of rope to the hook of the scale and placed my foot in the loop, at 27 kg the rope broke!
Pattex Power Fix: 6 kg
Pattex PL600: 7 kg
Tangit M400: 27 kg
The pictures above are coming from a video I made during the test, they all are the last frame before the tubes came loose or the rope broke. I still don't know how much it would hold but I'm pretty sure the M400 glue is strong enough both for splicing and for the tubes and pins of the boosters...
At the 15th of January the new rocket made its maiden flight, it was a beautiful day to launch a water rocket.
Weather data of sunday 15 January 2012
partly cloudy
Temperature: 2.5°C
Wind: 2.7m/s = 2Bft 87° = East
Air pressure: 1026.6 hPa
Humidity: 87%
We arrived at launch site at 15:45, after setting up the launcher and rocket I wanted to set up the launch trigger mechanism and then I realised I just forgot to mount the springs on the gardena quick connector, they were still in the shed. In spite of the risks related I decided to launch the rocket manually.
Launch pressure for the first launch was 90 psi, and the tommy timer was set at approximately 5 seconds. The 808 key cam was attached to the side of the rocket and pointing downwards. Pressurization went very well with no audible leaks.The rocket took off pretty fast and flew straight up, there was quite a lot of spin but that was expected because the fins are not properly lined out. The tommy timer side deployment did his job and the chute came out just after apogee but the chute itself failed to open until about 10 meters above the ground, probably because I had it lying around folded. Because the batteries of the digital dv cam gave up there's no ground footage of this flight.
With the first launch being a success ,apart from the chute, I decided to launch the rocket at 100 psi with the tommy timer set to 6 seconds, this would give the rocket some more time to speed up before the chute comes out in order it would catch more wind and open quicker. It was a nice flight again, the chute opened very fast and the rocket descended back to earth slowly. The onboard view shows a lot of spin again and also that the fins "flapped" at top speed, this could be because the fins are just to thin or because they tend to "hinge" were they are glued to the bottle. The ground footage of this flight was taken by a 7 year old girl an shot with a mobile phone, good job!
The fins need some adjustments but I'm very happy with the results of this first flights...
To launch the new rocket I definitely needed to build a new launcher because the other one was way to small for this rocket and you couldn't really call it a "launcher". The new launcher should contain the gardena quick release and a launch rod to guide the rocket. I wanted to make it a tripod so it would be stable on uneven surfaces. Beneath is an image I made with Blender (a free open source 3D creation program) just to see what it would look like.
I had some leftover plywood which would function as a base for the launcher. For the launch rod I used 2 pieces of 10mm glass fibre rod fitted over a piece of 8mm carbon fibre rod, this makes the rod easy to transport because it can be divided into two parts. The legs of 50cm length where sawed from a mounting rail and are mounted on the base with bolts and nuts, so they can easily be removed for transport. The gardena quick release is pulled down by a pair of springs, during pressurization the quick release is held in the locked position by a piece of wood. At launch this is pulled out, the springs pull the collar down and the rocket is released.